Verify Before Updating
Always check that the Status is IN-TRANSIT before tapping “In warehouse”. Only update when the package has actually arrived.
The Returns process helps you handle customer returns efficiently. You can search for returns using three different methods, view all return details, and update the status when packages arrive at the warehouse.
This guide walks you through the complete process from searching for a return to updating its status.
The Returns process has three main steps:
You can search for returns using three different methods. The app only uses one field at a time, so when you click on a field, the others are automatically cleared.
Open the Returns module
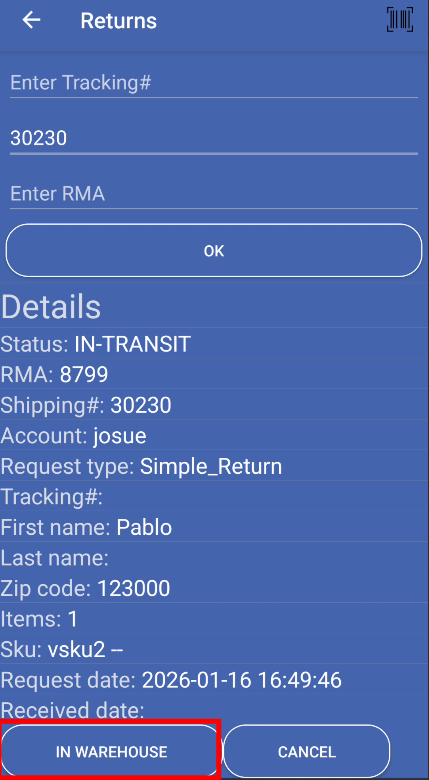
From the main menu, tap Returns. The Returns screen opens with three empty search fields at the top.
Choose your search method
You can search using any of these three fields:
Click on the field you want to use. The other two fields will be cleared automatically.
Enter the search value
You can enter the value in two ways:
Option A: Camera Scanner
Option B: Keyboard Entry
Search for the return
After entering the value, tap the OK button. The app shows a “Please wait” message while searching.
Wait for results
The app connects to the server and searches for the return. If found, all details appear in the Details section below.
One field at a time:
Field hints:
Enter key support:
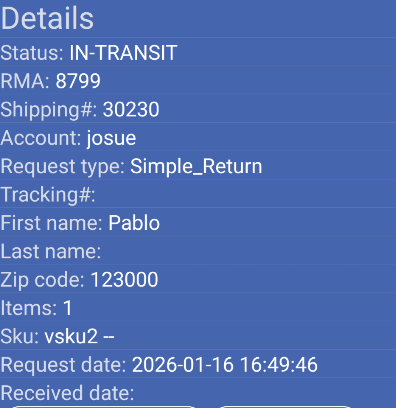
After searching, the app displays all return information in the Details section. Review this information carefully to make sure it matches the physical package you received.
Status:
Status determines button availability:
The Details section shows:
Return identifiers:
Account information:
Customer details:
Product details:
Important dates:
Before updating the status, verify:
When a return package physically arrives at the warehouse and you’ve verified all details, update its status to “In warehouse”.
Verify the status
Check that the Status field shows IN-TRANSIT. This is required to update the status.
Check button availability
Look at the In warehouse button:
Update the status
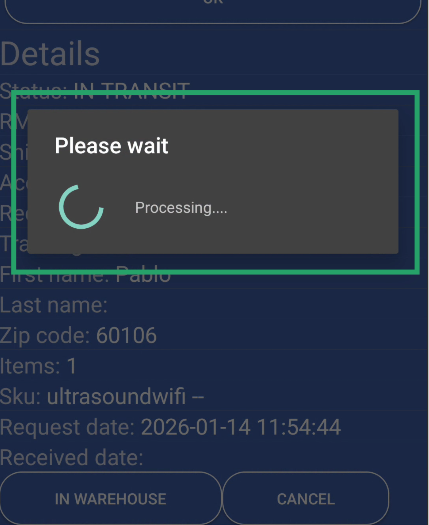
If the button is enabled, tap In warehouse. The app shows a “Please wait” message while processing.
Wait for confirmation
The app sends the update to the server. You’ll see a confirmation message showing the new status.
Verify the update
After updating, the status changes to PROCESSING and the In warehouse button becomes disabled. This confirms the update was successful.
The In warehouse button is disabled when:
This is normal behavior. You can only update returns that are in transit.
The Returns module supports multiple scanning methods for faster data entry.
Setup:
Usage:
Process first return
Search, review, and update status to “In warehouse”.
Clear fields
Tap Cancel or use back button to return to main menu.
Open Returns again
From main menu, tap Returns again.
Process next return
Search for the next return using any method.
Repeat
Continue processing returns one at a time.
Open Returns module
From main menu, tap Returns.
Tap camera icon
Click on RMA field, then tap the camera icon in the toolbar.
Scan barcode
Point the camera at the RMA barcode. The camera scanner app opens automatically.
Automatic processing
Value is entered automatically in the RMA field and search starts.
Review and update
Check details and tap In warehouse if status is IN-TRANSIT.
Always check that the Status is IN-TRANSIT before tapping “In warehouse”. Only update when the package has actually arrived.
Review all return details to ensure they match the physical package you received. Check RMA, SKU, and item count.
After tapping “In warehouse”, wait for the confirmation message. Don’t tap multiple times.
If you see an error, check your connection and try again. Verify the return number is correct.
Problem: The button appears grayed out and you can’t tap it.
Solution: This is normal. The button only enables when Status is IN-TRANSIT. If Status is PROCESSING, the return has already been updated or is in a different state.
Problem: After searching, you see “Error, try again please”.
Solutions:
Problem: Camera icon doesn’t work or asks to install app.
Solutions:
Problem: Tapped “In warehouse” but status didn’t change.
Solutions:
Next Steps: