Accurate time tracking
Track exactly how much time you spend on each project with a built-in chronometer that runs continuously.
The Project Clock module lets you track the time you spend working on different projects in the warehouse. You can start a timer for a project, stop it when needed, add comments when finishing, and sync your time data to the server.
This feature helps warehouse managers monitor how much time employees spend on different tasks and projects, making it easier to track productivity and allocate resources.
Track exactly how much time you spend on each project with a built-in chronometer that runs continuously.
Organize your work by projects. Each project can be started, stopped, and finished independently.
Add comments when finishing a project to provide context about what was accomplished.
Time tracking works offline. Your data is stored locally and synced to the server when you tap Sync.
See the elapsed time displayed prominently in hours, minutes, and seconds format (HH:MM:SS).
Visual alert shows when you have unsynced time data that needs to be sent to the server.
Open Project Clock
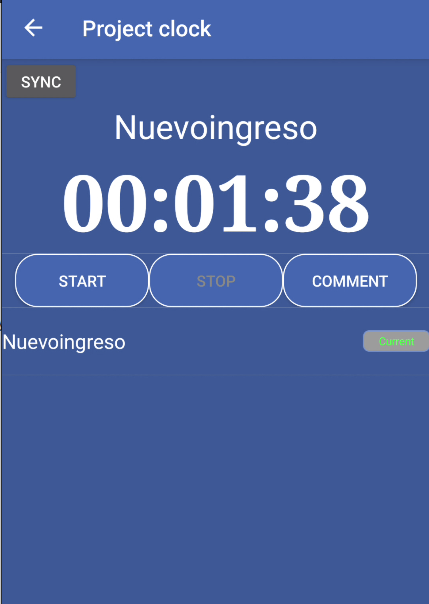
From the main menu, select Project Clock. The screen shows a large timer display, control buttons, and a list of available projects.
Select a project
Tap a project from the list at the bottom of the screen. The project name appears above the timer, and it becomes the active project.
Start tracking
Tap the Start button to begin tracking time for the selected project. The timer starts counting from 00:00:00 (or continues from previous time if the project was stopped).
Monitor your time
Watch the timer display showing hours, minutes, and seconds. The timer updates in real-time as you work.
Stop when needed
Tap Stop to stop the timer. You can resume later by tapping Start again, and the timer continues from where it stopped.
Finish the project
When you’re done with a project, tap Comment. A dialog opens where you can add a comment about what was accomplished, then finish the project.
Sync your data
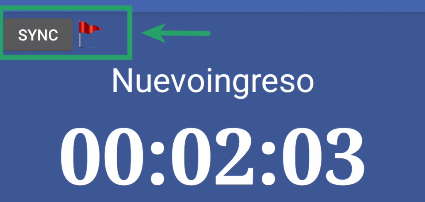
Tap the Sync button to send your time tracking data to the server. If you have unsynced data, a red alert icon appears next to the Sync button.
The large timer shows elapsed time in three parts:
The timer format is HH:MM:SS (e.g., “02:15:30” means 2 hours, 15 minutes, and 30 seconds).
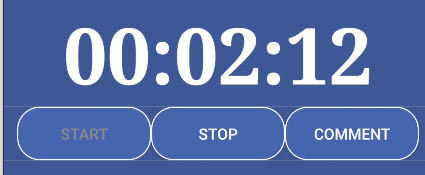
Start
Stop
Comment
Located at the top of the screen:
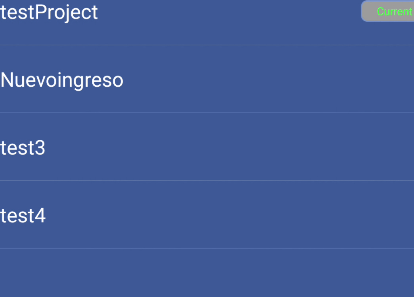
At the bottom of the screen, you’ll see a scrollable list of available projects:
You can switch between projects while tracking:
When you finish a project:
Comments help provide context about what was accomplished during the tracked time.
To see more details about a project:
The Sync feature ensures your time tracking data is saved to the server:
A red alert icon appears next to the Sync button when:
The alert disappears after successful sync.
Start the timer as soon as you begin working on a project. Don’t forget to start it, as time only counts when the timer is running.
Use the Stop button when taking breaks or switching to non-project tasks. This ensures accurate time tracking.
When finishing a project, add comments that describe what was accomplished. This helps managers understand the work done.
Sync your data frequently, especially before closing the app. This ensures your time data is saved to the server.
Always verify you’ve selected the right project before starting the timer. Check the project name above the timer display.
When done with a project, tap Comment to finish it properly. This ensures the project is marked as complete with your comment.
Problem: The Start button is grayed out and you can’t start tracking.
Solutions:
Problem: The timer shows 00:00:00 and doesn’t increase.
Solutions:
Problem: The project list is empty or shows “No available projects”.
Solutions:
Problem: The sync alert icon stays visible after tapping Sync, or sync fails.
Solutions:
Problem: You started tracking time for the wrong project.
Solutions: